Mastering the First Bedroom
Master Suite – Our First Major Transformation
We made the decision early on to focus on our master suite as the first living space to complete. I knew that I was definitely going to need a “getaway”, if you will, from the renovation craziness. There was something very appealing about being able to go to my own room at the end of each day and climb into my own bed and have a finished (and clean) space to wake up to each day. We decided to get all of the wallpaper removed and the walls prepped for painting and then painted before beginning the floors. We would later change up that strategy for other rooms (more on why later) but that was the current plan for our room.
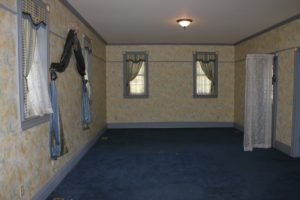
Now the master bedroom was unique, in more ways than one. It is a really large room with an unusual configuration. We learned from the daughter of the original owners that the orientation of the windows had all been determined by where the owner’s furniture was going to go. And the room is long and narrow in one part because the original blueprints for the room had been modified. That space was originally supposed to be the walk-in closet but it was too small for the first owner so she chose to sacrifice the original master bath (now our closet) in order to make a larger closet.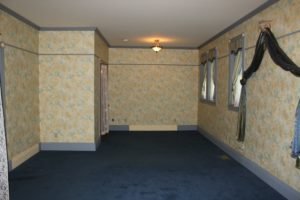 We did not really want our bed to cut the room in half (notice the fabric on the wall that hung over the previous owner’s bed) so we configured things differently and decided the narrow part of the room would eventually be used as a sitting area (just outside of what would soon be the master bathroom.)
Who Needs to Move Furniture When Painting Baseboards Anyhow?
The before photos from this room are a great example of every room having painted woodwork to match the wallpaper in that particular room. I especially like how the baseboard color was once yellow and when it came time to switch it up to blue, the previous owners simply painted around the furniture!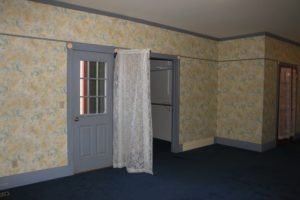
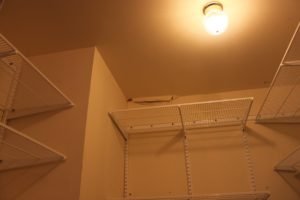
So let’s talk about the closet. It is nice and big but there were two issues with it. First it had some residual damage from a water leak that we needed to resolve and second, it was dark for such a large closet. We had a plan for the darkness and you’ll see more on that in a future post. So this was Warren’s first drywall repair project, the first of many drywall projects and boy does Warren love drywall work; just ask him!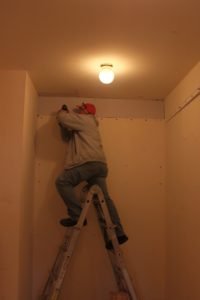
Creating a Master Suite
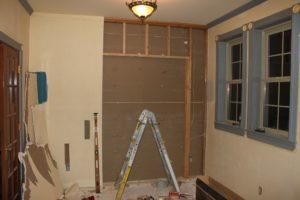
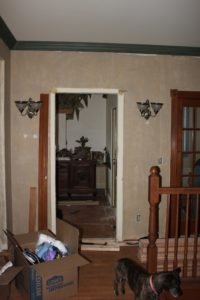
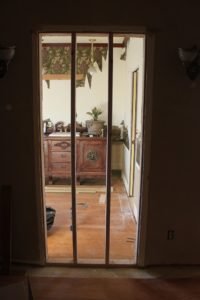
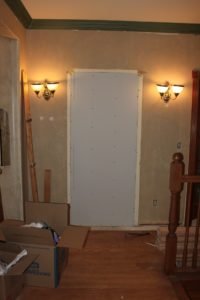
We also had plans to create a true master suite. When we purchased the house, what would become the master bathroom was the only bathroom upstairs. We saw an easy opportunity to eventually transition the upstairs laundry room into a guest bath allowing us to close off the hallway entry to the only current bathroom upstairs to make it a private bath for our room. To create the suite however, we needed to open up a bathroom entry from the master bedroom. I didn’t want an awkward door swinging in/out from the bedroom so we came up with the plan to create a pocket door.
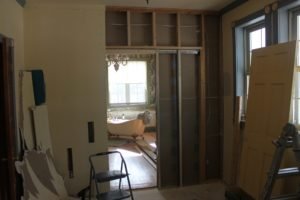
And I’m so glad we did; it’s a neat and clean access, we didn’t have to sacrifice any wall space in either room, and it was an affordable option. The pocket door kit was not expensive at all and we were able to use a small door that we had removed from the kitchen that already matched all of the other doors in the house.
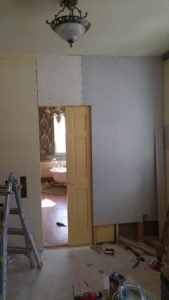
Once the pocket door was in, Warren was able to focus on closing off the hallway door into the bathroom.
So just like that, we had ourselves a master suite! And with that, we were ready to get some paint on the walls so the floors could then go down. Just having the wallpaper down from an entire room was pretty exciting, We couldn’t wait for the paint to go up! Up Next: Paint Choices! {Shelley}
Shelley
I am simply a wife, mom to four (2 humans and 2 dogs), and grandma to three sweet kiddos. I am a humble human working hard to build a stronger relationship with both my God and others; relationships that will prayerfully lead to more people coming to know the Good News of Jesus Christ. I'm learning to spin a little more faith into everything I do, every single day!

3 Comments
Pingback:
Shelley Hall
Yes, it’s been fun to go back through all of the photos as I write these posts because even Warren and I have forgotten about so many of the details! Glad you are enjoying the posts Lynn!
Lynn
Loved seeing where the entrance to that bathroom was! I hadn’t seen that before! Love hearing about all of this!!!!
Lynn